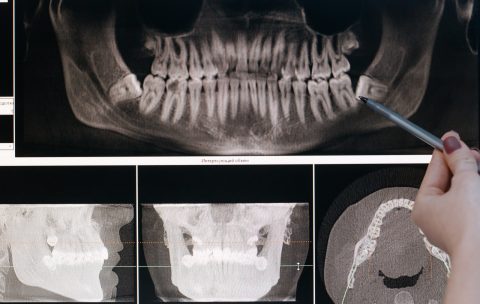
Unlike the automobile and aerospace sector that inspect large parts, dental and medical parts are small. Scans can be done relatively quickly and at lower energies, thereby making the technology affordable for smaller practices.
Once manufactured, components made for the dental industry typically land in air-conditioned dental and medical laboratories. These are quiet, temperature-controlled environments that are not subject to large-scale mechanical vibration. These reasons alone mean there is a much lesser need in this industry for a 3D-CT solution derived from a granite base–a machine feature that’s well known for its effective absorption of vibrations.
In many cases, the smaller a component, the larger the volume being produced in line with demand. Production volume is what justifies the investment in automated technology.
Instead of manually loading Impressions one at a time, we can load a tray of 30, 50, or 100 for inspection.
Automated loading and unloading plays a massive role in batching parts and batch-inspection by reducing cycle time. In a fast-paced production environment where speed directly impacts cost, manual intervention must be minimized. Any step-change that can aggregate fabrication is advantageous.
Over the last few years, we have seen improvements in scanning speed and image detection. Software is more sophisticated, detecting more minor anomalies characterized by shape or size. We have seen advancements in flat-panel-displays that enable much greater spatial and voxel resolution, positively addressing throughput-related challenges.
The last ten years have seen refinement in technology, driving down the cost of 3D-CT while enabling machines to be more user-friendly. Our dental industry-enabled machines at VJ Technologies (VJT) take a day of training at most for a user to operate efficiently and independently. Users should be mindful that scanning equipment should be leveled and aligned within specified guidelines and that a scanned part must stay in the machine’s field view. The 3D-CT scanning method comprises multiple variables, calculations, and formulas that assist in developing and refining a product.
Improvements to technology never stand still. For more than thirty years, VJT has delivered Two-dimensional (2D) and 3D digital x-ray inspections. For the past decade, we have immersed ourselves in 3D excellence. As ever-moving technological developments enable finer resolution, higher powered x-ray sources, finer pitched digital detectors, and faster computers, we can deliver solutions more quickly and cheaply to our customers. Processes that once were not economic are quickly becoming cost-effective.
The world is moving to 3D. By the year 2030, 3D scanning superiority will likely have taken the place of 2D scanning, and all manufactured components will be inspected inline.
We have all seen technology development in our lifetimes, with computers, toasters, refrigerators, and AI—technology is going to continue to grow at an astounding rate. In the dental and medical sectors, that rate is going to allow us to bring more value to the customer.
We will see the miniaturization of 3D-CT machines as new x-ray tubes outstrip current models and become more reliable. Engineers and innovators will likely repackage 3D-CT for dental and medical into much smaller containers. Taking computing as an example again, 60 years ago, a typical computer filled a large room, and now we hold it in the palm of our hands. Three Dimensional Computed Tomography technology for dental and medical is headed in the same direction.
Marco Iacono, VJT, Head of Regional Sales, New York, believes we will see FAI becoming compatible with Product Manufacturing Information (PMI). ‘This companionable mix would allow engineers to create a CAD model of the part and call out all its dimensions and tolerances. The CAD model could then be uploaded to a CT system, and its corresponding part would be scanned and compared to the CAD. The benefit is that setting up the part and its parameters in the CT system would not be required. For a manufacturer of “cats and dogs,” [broad spectrum parts] reducing skilled labor would be extremely valuable.’ This analysis is instrumental in components such as stents or pacemakers where a malfunction would be critical.
With this level of insight, both new and long-standing customers see the value in 3D-CT. They often seek reassurance that 3D-CT will meet their needs and that the end deliverables will justify the expense. Nevertheless, they know the productivity and cycle-time differences that automated inspection via 3D-CT can make in their production processes. Every day, CT scanning is getting faster and cheaper. It is enabling engineers and manufacturers to penetrate competitive markets with quality-tested products. For those reasons, 3D-CT is slowly making its way into multiple industries.
VJT’s Test and Learn Service offers assurance to any potential buyer. We will scan a part and provide images and data analysis that show and tell engineers and manufacturers exactly what their processes produce.
As organizations take advantage of VJT’s Test and Learn and embrace automated inspection via 3D-CT, they can better understand why optical inspection could not easily find their product’s defect. Unfortunately, many decision-makers start with optical scanning, fail to find the flaw, and then move to 2D or 3D scanning—costing them more than if they had gone straight to scanning via CT.
Computed Tomography is a superior and cost-effective alternative to optical scanning. Not only does it make the invisible visible, but It removes steps in any process. One of our clients—a leading manufacturer in the dental space—saves approximately $1-$2 for every impression made. They run around 6000 images each day across five CT machines. At that volume, a $6,000-$12,000 savings per day means that their 3D-CT machine quickly pays for itself.
What is vital to our customers, and the question that we get asked most frequently is: will your machine do precisely what I need? VJT is a custom solution provider.
We take our VedaCore 3D-CT machine, and we customize it to suit our customers’ requirements.
A recent client came to us with a scanning need driven by the volume of products they needed to scan daily. They purchased multiple machines to do the same thing, and we customized their software to inspect a manifold of dental impressions. We take our VedaCore Framework and we tailor the application software that sits within it to deliver against your inspection criteria.
The VedaCore is just one of VJT’s 3D-CT scanners. From an inspection standpoint, not only is the VedaCore next-generation technology, but it is scalable and easy to use. As part of our design criteria, we wanted dental technicians to be able to operate the VedaCore easily, and they can. We wanted users of 3D-CTto easily tell the machine about a component’s dimensions and tolerances; again, they can.
Share to:
New Paradigm in Additive Manufacturing
Read about the benefits for Computed Tomography for Additive Manufacturing

